![]()
openDesktop Files
An Enterprise File Sync and Share solution that keeps data under control.
With openDesktop Files users have easy access to their files, photos and documents to work and share with their friends, family, team members and customers. openDesktop Files is an open-source file sync and share solution designed to be easy-to-use and highly secure.
Getting started
Navigating through folders is as simple as clicking on a folder to open it and using the back button on your browser to move to a previous level. Use a navigation bar at the top of the Files field for quick navigation.

Creating, selecting, moving and deleting files and folders
Creating files and folders
To create and upload file or folder, click on a + New button.

You can create a folder, plain text file, or office documents like Documents, Spreadsheets and Presentations.
Selecting files and folders
Selecting one or more files and folders is done clicking on their checkboxes. To select all files in the directory, click on the checkbox located at the top of the directory listing.
··· (three dots) is known as Overflow menu. It has similar functionality like right-click on a file or folder.
Moving files and folders
There are three ways to move files and folders. First is selecting checkbox of the file or folder, then from ··· Actions choose Move or copy and choose a new location to move a file or folder.

Similar process is to click on ··· located at the right side of file or folder, choose Move or copy and choose new location to move a file or folder.

Another way is to click and hold (drag and drop) a file or folder into any directory. You can drag and drop a file into navigation bar ··· to move file one level up.

Deleting files and folders
To delete file or folder, you can click on its checkbox and ··· Actions button will show up at the top of the directory listing. From ··· Actions dropdown choose Delete. If you want to delete one file at a time, easier way is to click on ··· on the right side of the file listing and choose Delete.
Downloading files and folders
Aside from deleting, it’s possible to download one or more files and folders. If more then one file is checked, it will download as a .ZIP file. Folders are always downloaded as a .ZIP file.
Tagging files, Favorites and Comments
Access Details view clicking on a ··· next to file or folder and choose i Details.

Tagging files
You can assign tags to files. To create tags, open a file to the Details view. Then type your tags. To enter more than one tag press the Return key after creating each tag. All tags are system tags, and are shared by all users who have access to your files. Manage and assign tags from the Apps information panel.

Favorites
Files and folders can be added to Favorites from ··· Actions, ··· or right click dropdown.
Favorites are easily accessible from the Apps information panel.

Comments
Use the Details view to add and read comments on any file or folder. Comments are visible to everyone who has access to the file.

Apps information panel

Filtering the files view
The left sidebar (Apps information panel) on the Files page contains several filters for quickly sorting and managing your files.
All files The default view; displays all files that you have access to.
Favorites Files or folders marked with the yellow star.
Shared with you Displays all files shared with you by another user or group.
Shared with others Displays all files that you have shared with other users or groups.
Shared by link Displays all files that are shared by you via public link.
Tags Search files by tags.
Deleted files and Storage
Under Deleted files you can see all deleted files. Information about storage and space usage is provided below.
Hidden files and WebDAV
Under Settings you can check Show hidden files which allows you to show or hide hidden files. These are also called dotfiles, because they are prefixed with a dot, e.g. .file. The dot tells your operating system to hide these files in your file browsers, unless you choose to display them. Usually these are configuration files, so having the option to hide them reduces clutter.
You can use an address to access your files via WebDAV.

Web Distributed Authoring and Versioning (WebDAV) is an extension of the Hypertext Transfer Protocol (HTTP) that allows users to create, change and move documents on a server.
Sharing files
Share the file or folder with a group or other users, and create public shares with hyperlinks.
Federated Cloud Sharing allows you to mount file shares from remote openDesktop Cloud servers, and manage them just like a local share.
You can set an expiration date only on public shares, and local shares do not expire when public shares expire. The only way to “expire” a local share is to click the trash can icon to un-share your files.
How to share files and folders with others
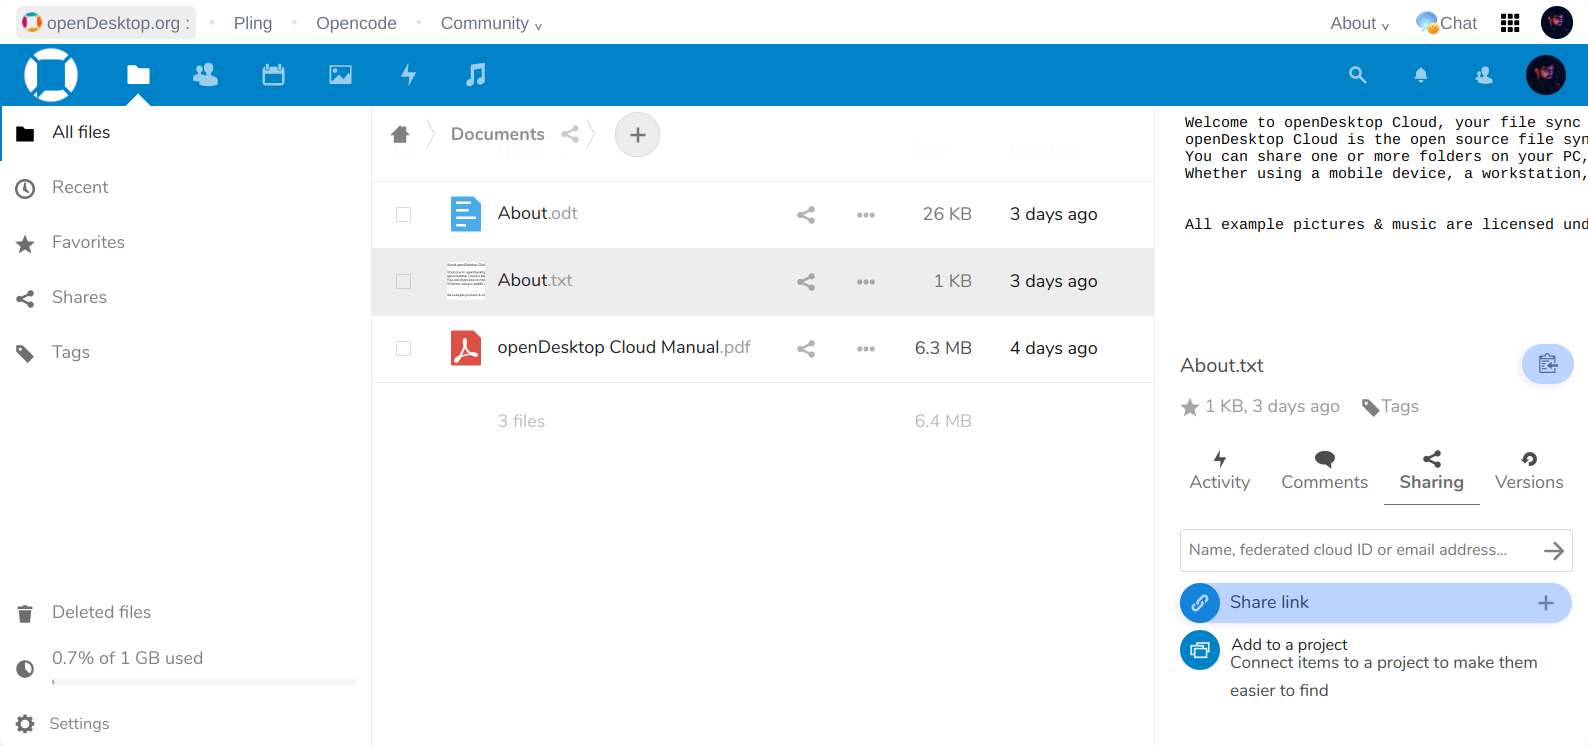
Sharing files is an easy process. From the Details view of the selected file, click on a Share link.
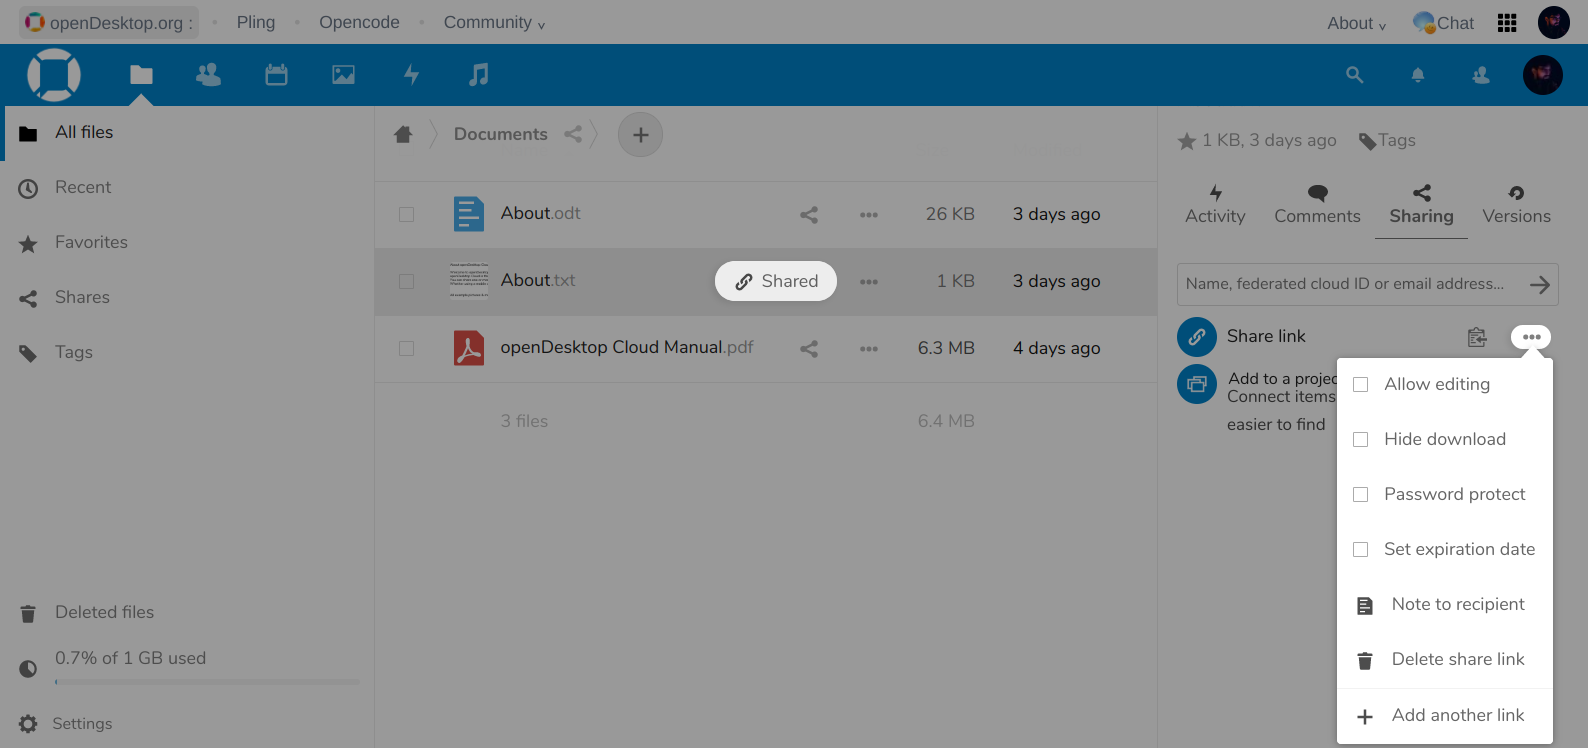
Alternative is to share a link clicking on a clipboard icon next to the file name, but it will create a direct link which will work only for users who have access to the file or folder.
A link with additional options will be created. In the Application view file will have a Shared status displayed.
Under Share link click on a clipboard icon to copy a shared link.
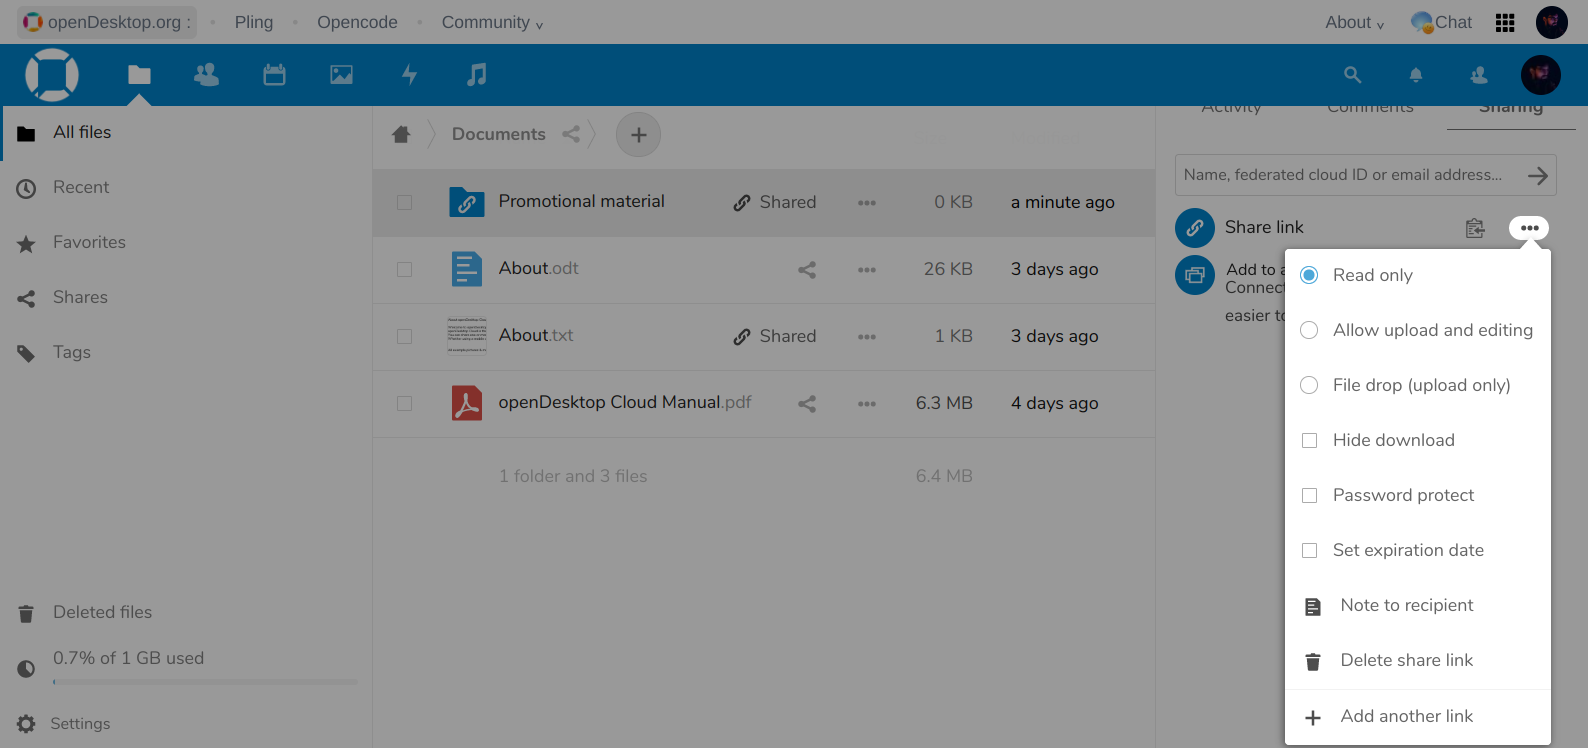
Sharing folders is the same way, with more options.
You can also see who you have shared with already, and revoke shares by clicking the trash can icon Delete share link.
All shared links can be found in Apps information panel under Shares.
Synchronizing with local machine
openDesktop Cloud fully supports the WebDAV protocol, and you can connect and synchronize with your openDesktop Cloud files over WebDAV.
Accessing files using Dolphin on Linux
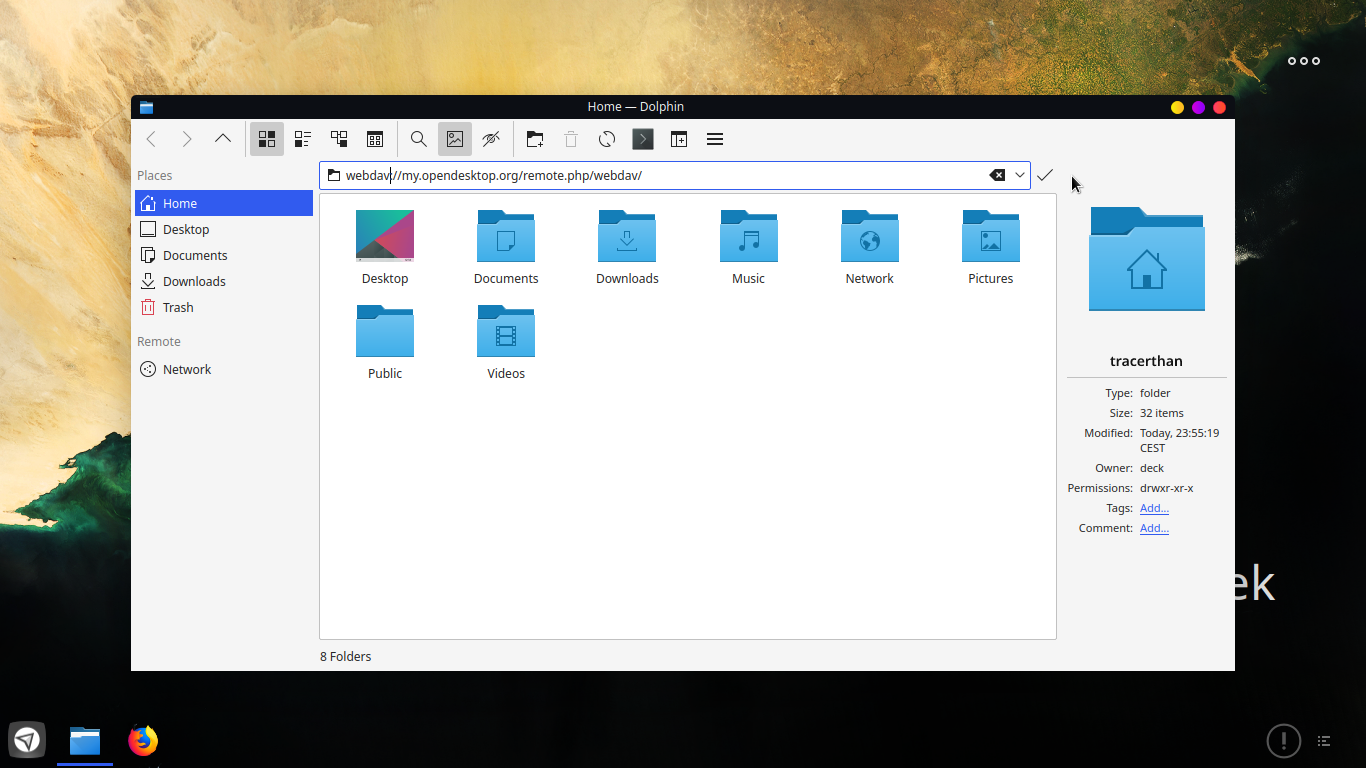
In this example we are using Dolphin file manager on Linux.
From Apps information panel open Settings and copy WebDAV address.
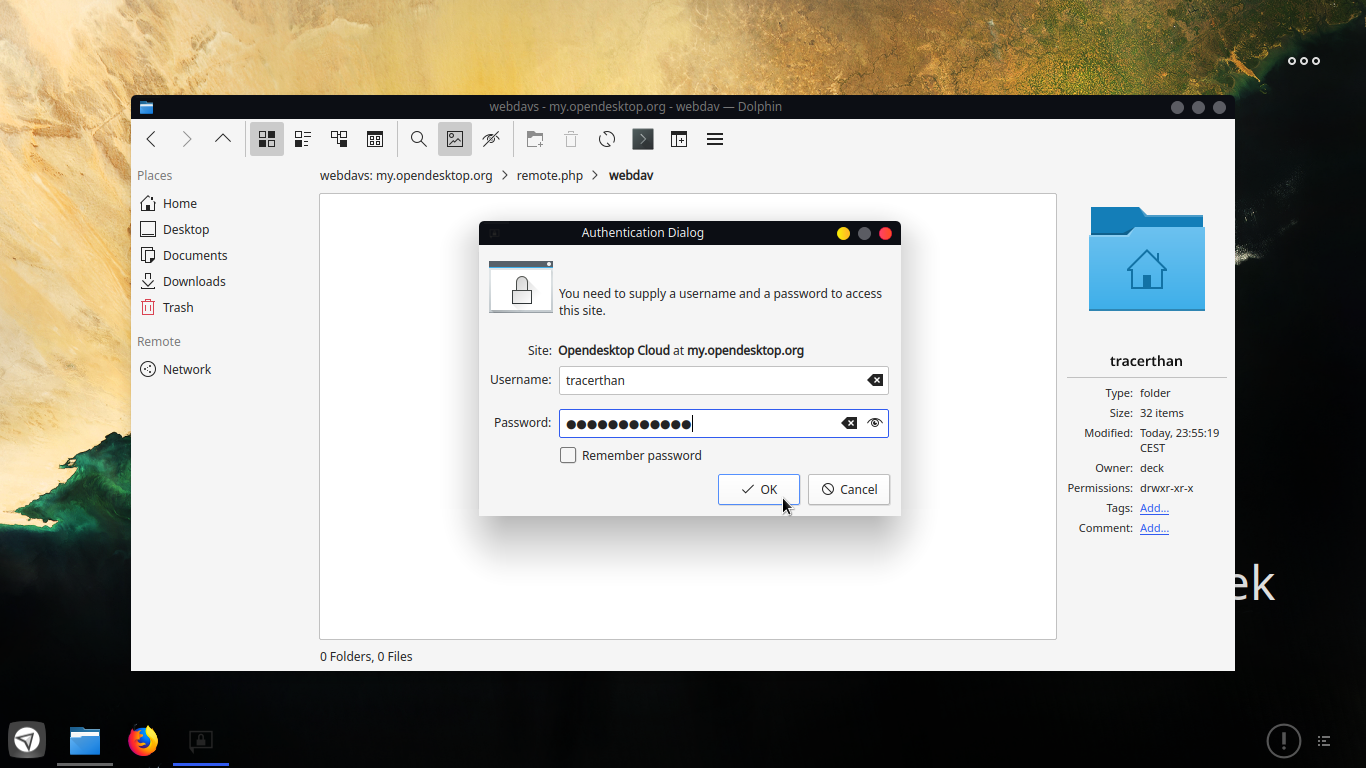
Use the webdav:// protocol in Dolphin.
webdav://my.opendesktop.org/remote.php/webdav/
Authentication dialog will ask for openDesktop Cloud username and password.
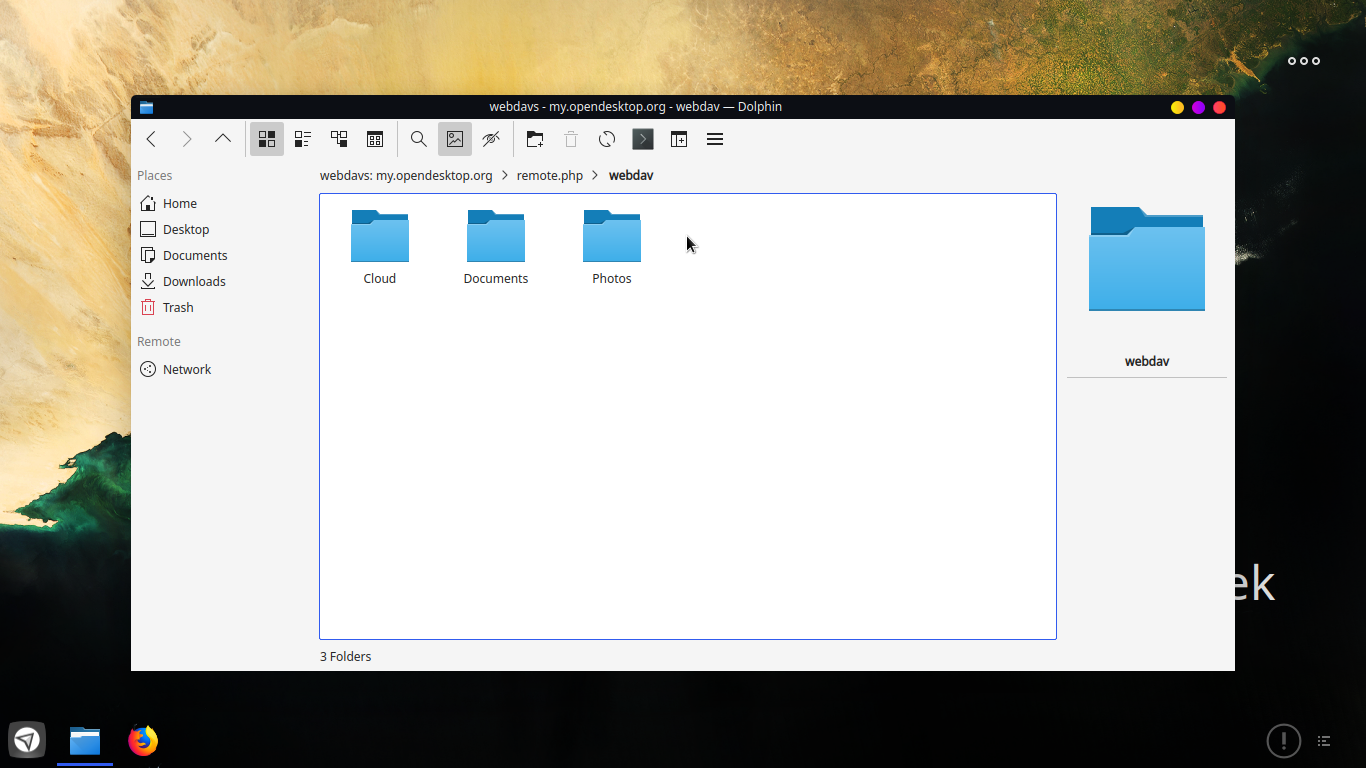
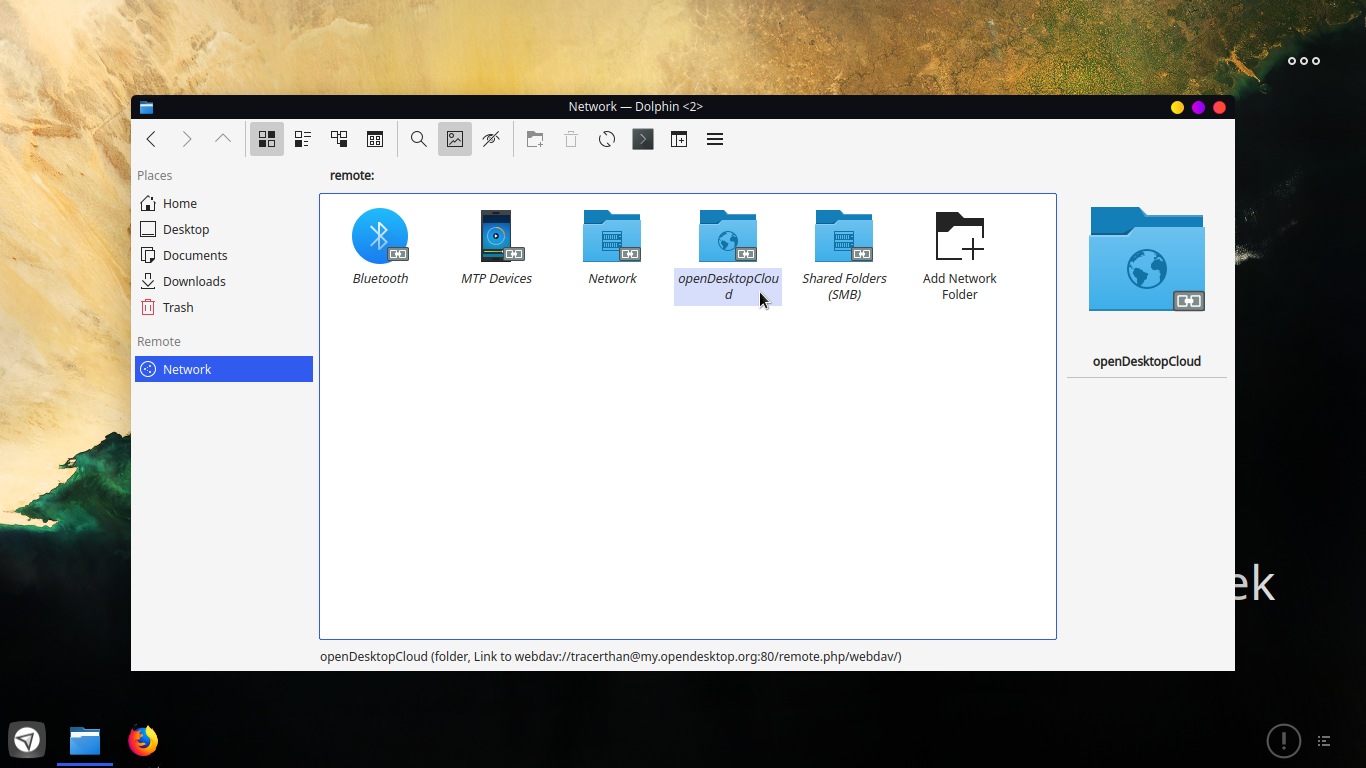
You now have access to your openDesktop Cloud.
Create permanent link to your openDesktop Cloud
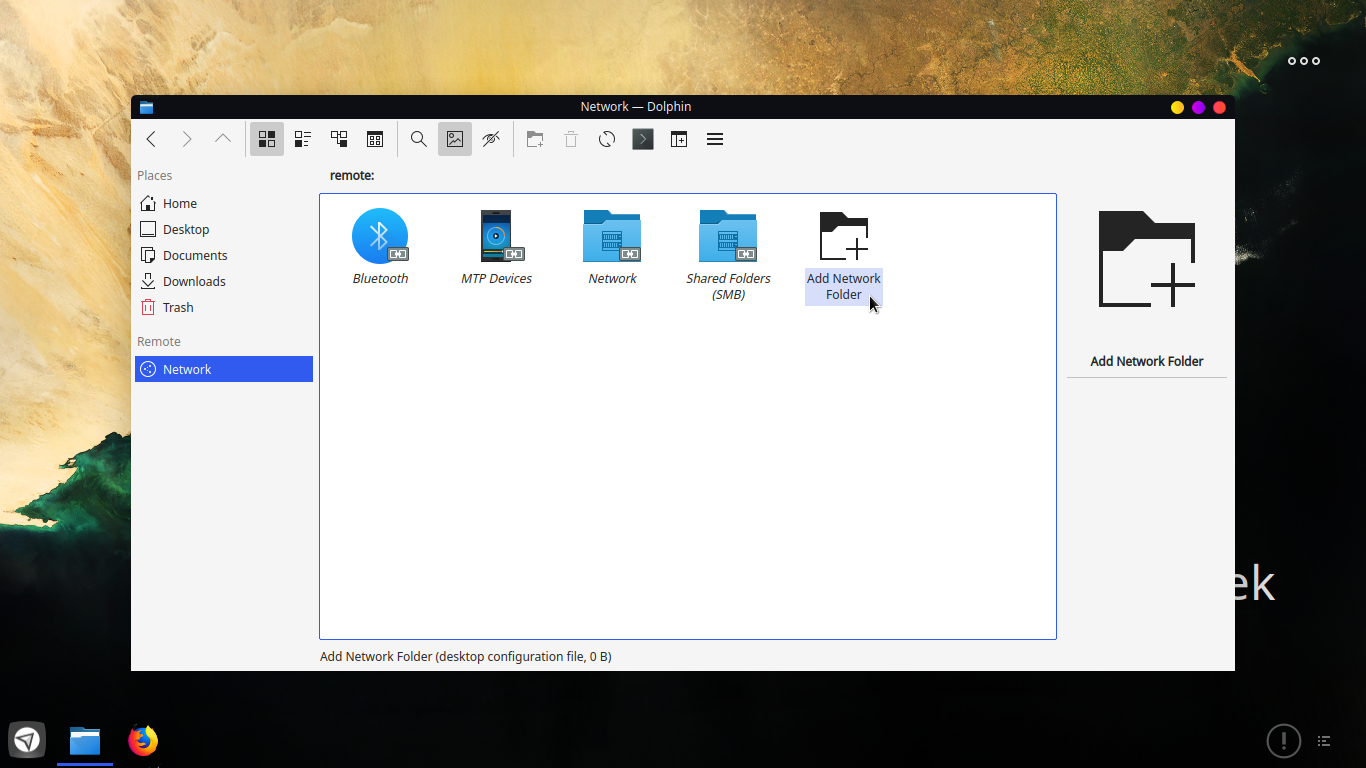
Open Dolphin and under Places click Network.
Network wizard will provide an option to choose WebDAV from the dropdown and click Next.
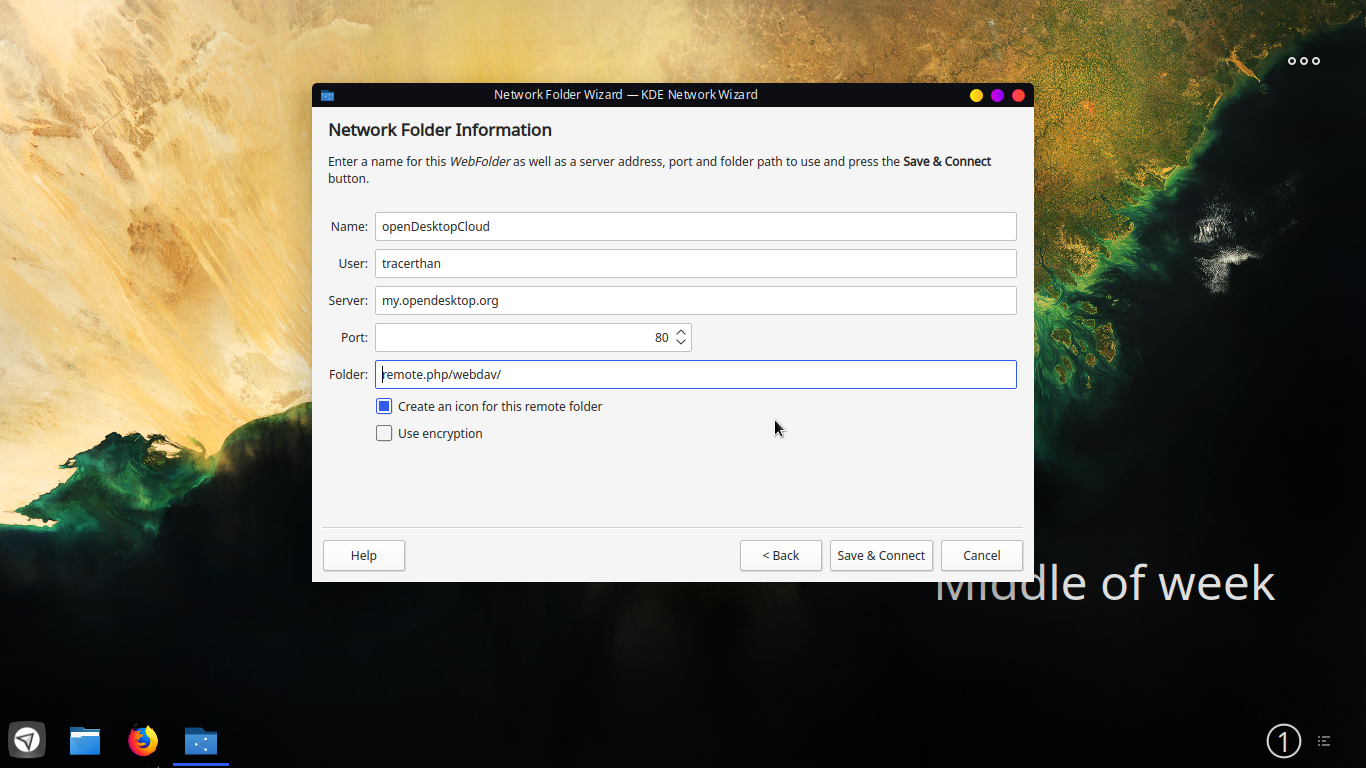
Enter the following settings:
Name you want to see in the Places bookmark.
User is your openDesktop username.
Server is openDesktop Cloud domain name
my.opendesktop.org
Folder path
remote.php/webdav/
Click Save & Connect.
openDesktop Cloud is now added to your Network and Places.
Using android application
The recommended way to synchronize openDesktop Cloud server with Android and Apple iOS devices is by using the Nextcloud mobile apps.
To connect your mobile app to a openDesktop Cloud server use the base URL:
my.opendesktop.org

Mobile app Large preview
You can use other apps to connect to openDesktop Cloud from your mobile device using WebDAV. WebDAV Navigator is a good (proprietary) app for Android devices and iPhones.
The URL to use on these is:
https://my.opendesktop.org/remote.php/webdav/
Connect to your account:

Connect to your account Large preview
Grant access to your device:

Grant access Large preview
openDesktop Cloud is ready for use on your phone.

openDesktop Cloud on your phone Large preview
For more information about WebDAV setup visit Nextcloud Documentation.
